Adam's Blog
Loading css, css-modules, and Sass with webpack
The css ecosystem is immense and, at times, intimidating. This post will start at the beginning. We'll go over loading basic css with webpack, then move on to css modules, and wrap up with Sass. If you have some experience loading css in webpack-based web applications, some of this may be old news for you.
Note that while the code samples in this post use React, none of the concepts are specific to it in the least. Also, this post does not cover css-in-js, for the simple reason that I haven't yet gotten around to diving into that ecosystem; I'm hoping by the time I do, it'll be a bit less crowded :)
Starting at the beginning: basic css loading
Let's say we're rendering this component.
const Component = () => (
  <div className="pane">
    <span>Pane Content</span>
    <ul className="list">
      <li className="list-item">Item 1</li>
      <li className="list-item">Item 2</li>
      <li className="list-item">Item 3</li>
    </ul>
  </div>
);
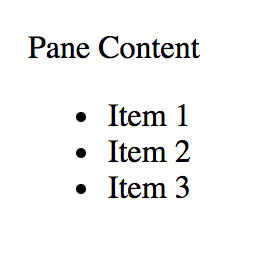
Without accompanying styles, it'll look something like this.
Let's add some basic styling. Let's start simple, and have the JS module this component sits in import a css file, with standard, global styling rules. The import will look like this
import "./styles.css";
Let's create that file, and add some purposefully ugly styles
.pane {
  background-color: green;
  max-width: 300px;
}

.pane span {
  color: purple;
}

.list {
  margin-left: 20px;
}

.list-item {
  list-style-type: lower-greek;
}
As we have it, this code leads to the following webpack error
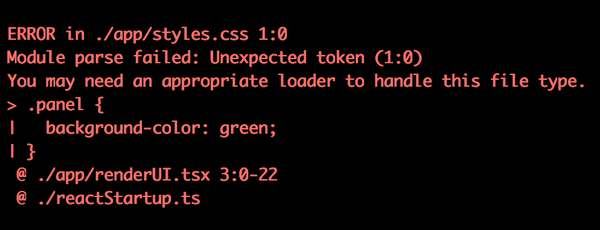
webpack only knows how to load standard JavaScript by default. To add other content, like css, we need to tell webpack how to handle it. Let's do that now. First, install the mini-css-extract-plugin and css-loader plugins, using your favorite package manager, in your favorite cli.
Now load the mini css extract plugin in your webpack.config.js file.
const MiniCssExtractPlugin = require("mini-css-extract-plugin");
Now, in the same config file, there should be a module object at the top of the config object, and somewhere under that, there should be a rules array. If either are missing, add them. Now, under rules, add this entry
{
  test: /\.css$/,
  use: [MiniCssExtractPlugin.loader, "css-loader"]
},
Finally, under the plugins array, also at the top level of your webpack.config object (add it if necessary), add this
new MiniCssExtractPlugin({
  filename: isProd ? "[name]-[contenthash].css" : "[name].css"
});
If you're new to webpack, and that went a little too fast for you, check out the webpack docs for a slower treatment of this.
Now, if we restart webpack, and reload our page, we should see this disgusting, but technically correct result
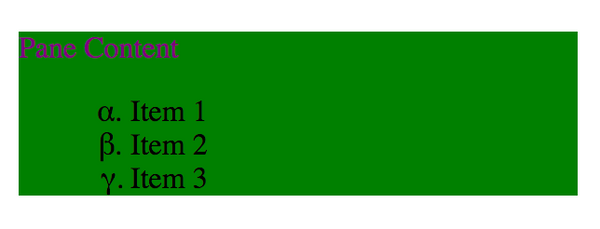
"Success" - hooray.
Adding CSS Modules
Right now we have code-split css. We can load css within any JavaScript module which uses it, and the CSS will only load if, and when that JS module is loaded. However, the css is global; if we add style rules for list-item in any other .css file, they'll conflict with the styles in this one. Wouldn't it be nice if we could have these styles be scoped only to the JS module which loads them? We can, with css-modules.
css-modules are a pre-processor step on your css file. It runs through all of your class names, and makes them unique. Moreover, it creates an exported object from the css file, on which these unique class names are exposed.
To enable this behavior, we'll first tweak the webpack loader rule, like so
{
  test: /\.css$/,
  use: [
    MiniCssExtractPlugin.loader,
    {
      loader: "css-loader",
      options: { modules: true, exportOnlyLocals: false }
    }
  ]
};
Note that the exportOnlyLocals may not be needed, as it should be the default; however, I've seen weird errors without it.
As we have it, our styles will still be loaded, but exposed behind dynamically generated class names. To apply them to our component at development time, we need to grab them off of the css module. Let's do that now
import styles from "./styles.css";
const { pane, list, ["list-item"]: listItem } = styles;

const Component = () => (
  <div className={pane}>
    <span>Pane Content</span>
    <ul className={list}>
      <li className={listItem}>Item 1</li>
      <li className={listItem}>Item 2</li>
      <li className={listItem}>Item 3</li>
    </ul>
  </div>
);
We now import an object from the css file. The keys of this object are the class names we wrote originally in the css file, and the property values are the dynamically generated class names. Note the weird syntax around the list-item class. JavaScript identifiers cannot be hyphenated, so you'll either need to alias it, or just use valid JS names in your css modules.
Edit - after publishing this, Marc Bernstein pointed out on Twitter that css-loader has a camelCase option that will convert hyphenated class names to camel-cased equivalents. You can read the docs on it here
Applying everything like so should reveal the same ugly output as before
Best of Both Worlds?
So far so good, but what if, like me, you think global styles aren't so bad, sometimes. What if you have some styles that you plan to be universal in your app, used almost everywhere, and manually importing them as dynamic values just isn't worth the effort? Examples might include a .btn, .table, or even a .pane class. What if the .pane class is intended to be used far and wide, with exactly one meaning. Can we make that class (and others) be global, while using css-modules for module-specific stylings, like our list classes, above.
You can, and you have two options: you can define each and every global css class with :global() (see the css-modules docs for more info), or, my preferred approach, you can use a naming scheme to differentiate global css files from css-modules.
Specifically, what if we decide that files ending with .module.css are css modules, and any other .css file is an old-school, global css file. webpack makes this possible with the oneOf construct. Basically, turn your entry in the rules section, from before, into this
{
  test: /\.css$/,
  oneOf: [
    {
      test: /\.module\.css$/,
      use: [
        MiniCssExtractPlugin.loader,
        {
          loader: "css-loader",
          options: { modules: true, exportOnlyLocals: false }
        }
      ]
    },
    {
      use: [MiniCssExtractPlugin.loader, "css-loader"]
    }
  ]
};
This tells webpack to match .css files against the first rule that's valid. If the .css file ends in .module.css, use css modules. Else, use global styles. Let's try this out.
Let's rename our original styles.css to be styles.module.css, and remove the .pane styles. It'll look like this now
.list {
  margin-left: 20px;
}

.list-item {
  list-style-type: lower-greek;
}
Now, let's add a new styles.css file, and put our pane styles from before, into it
.pane {
  background-color: green;
  max-width: 300px;
}

.pane span {
  color: purple;
}
Now, we'll import the global css styles (probably in one place, at the root of our application) like we did originally
import "./styles.css";
and we'll grab the dynamic class names for the things we left in the css module, as we did above
import styles from "./styles.module.css";
const { list, ["list-item"]: listItem } = styles;

const Component = () => (
  <div className="pane">
    <span>Pane Content</span>
    <ul className={list}>
      <li className={listItem}>Item 1</li>
      <li className={listItem}>Item 2</li>
      <li className={listItem}>Item 3</li>
    </ul>
  </div>
);
If all went well, everything should look identical to before.
Getting Sassy
Lastly, let's say you want to add Sass. Being subject to normal developer constraints, you certainly can't convert each and every css file to be scss, so you want to support both, side-by-side. Fortunately this is the easiest part of the post. Since scss is a superset of css, we can just run all .css and .scss files through the sass-loader as a first step, and leave all the rest of the css processing the same, as before. Let's see how.
First, we'll install some new dependencies
npm i node-sass sass-loader --saveNow, we'll add a slight tweak to our webpack rules
{
  test: /\.s?css$/,
  oneOf: [
    {
      test: /\.module\.s?css$/,
      use: [
        MiniCssExtractPlugin.loader,
        {
          loader: "css-loader",
          options: { modules: true, exportOnlyLocals: false }
        },
        "sass-loader"
      ]
    },
    {
      use: [MiniCssExtractPlugin.loader, "css-loader", "sass-loader"]
    }
  ]
};
We added sass-loader as a new, first loader (loaders are processed from right to left). Did you catch the other change? It's the two ?'s in the test properties. ? means optional in regular expressions, so all this means is, our rules now apply to both .css and .scss files. Plain .css files are processed by the sass-loader, but again, css is a subset of scss, so this is effectively a no-op.
To make sure things still work, let's convert our css files to scss, add some Sass, and maybe even tweak the styles to be even cooler, and make sure everything still works.
First, for styles.css, we'll rename it to styles.scss, and add a few upgrades.
$paneColor: pink;
$paneSpanColor: purple;

.pane {
  background-color: $paneColor;
  max-width: 300px;
}

.pane span {
  color: $paneSpanColor;
}
Now, we'll rename styles.module.css to be styles.modules.scss and make it look something like this
$listStyleType: armenian;

.list {
  margin-left: 20px;
}

.list-item {
  list-style-type: $listStyleType;
}
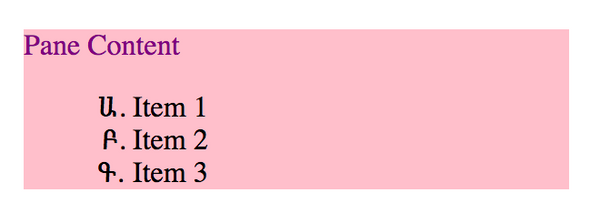
after re-starting our webpack process, our cool component should look like this
Concluding thoughts
In the end, a few lines of webpack config allowed us to easily load global, or scoped css, with optional sass processing in either case. Of course this is only scratching the surface of what's possible. There's no shortage of PostCSS, or other plugins you could toss into the loader list.
Happy Coding!